I’m excited to share our first big house project! Earlier this month we tackled refacing the fireplace. It wasn’t a true DIY by any means, but it was a still a project. It is a wood-burning fireplace, which we loved; however, we were not a fan of its dated look. The mantle and hearth seemed like an afterthought to the layout of the fireplace. The mantle consisted of just a shallow wooden shelf placed at a fairly low height. The hearth sat raised slightly above the floor and was framed with wooden strips. Here’s a picture to show what the fireplace looked like before its facelift:
Since we wanted to reface the fireplace, we had to first decide what we wanted it to look like. After looking at pictures on Pinterest, Houzz, and home magazines, we decided that we liked the look of a white wood mantle with tile framing the fireplace opening and tile that was flush with the hardwood floor for the hearth.
We found a contractor to do the work for us, as we didn’t have the proper tools or expertise to do the job. He worked with us to determine the desired dimensions of the new mantle/hearth layout for the fireplace. Our biggest desire was to make the fireplace a visual feature and feel proportional to the size of the room. This is a sketch of what we came up with:
Once we agreed on the design of the layout, it was demo time! (Well, for the contractor, not for us). Removing the mantle and hearth was a relatively easy and non-messy task. As you can see below, the old mantle was a casing screwed into the wall. The slab of slate for the hearth had just been installed on top the wood floor (that was shocking) and came right off without much chiselling. Now you can understand why I say that there wasn’t much thought put into the original design for the fireplace. After demo was complete, the contractor outlined the whole layout of the mantle and hearth cutout. It was awesome that he did this because we could visualize the actual size of the proposed design in comparison to what was there before.
The contractor built the wood mantle for us from scratch utilizing a shadowbox design. In the meantime, the hubby and I had to pick out the wall and floor tile. At first, we thought we had wanted mosaic style tile for the wall (like the small square tiles or glass rectangular tiles). However, it was a beautiful beige 3D Brick style tile that caught our eye. Once we saw it, we fell in love and decided that that would be our tile.
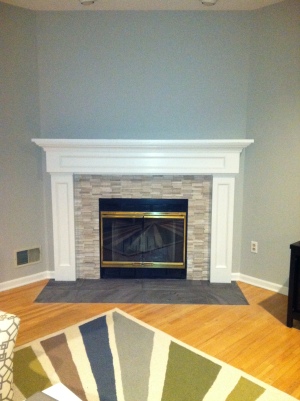
So here’s the finished product!
And here’s another comparison of the before and after. It’s like night and day. We are extremely pleased with how the new fireplace design turned out. =D


Ooooooh love love love!!!